The Construction of Footed Arrow Shafts
This page last updated on 02/042/2002
Please click on the thumbnail images for a full sized photo.
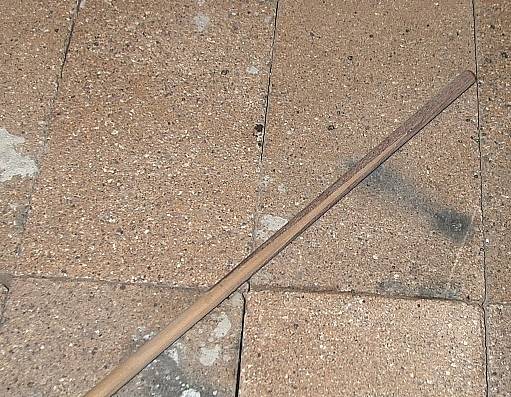
The purpose of this page is to document the steps needed to produce a footed arrow shaft. The steps described here are not traditional. Rather they are designed to produce traditional looking results quickly and consistently. I have made exactly one footed shaft entirely with hand tools. The rest have been made with the following process.
The first step is to determine the wood you will be using. For this arrow (a presentation arrow for Caids Queens Champion archery event), I wanted a very dark straight grained wood. The idea was to create a highly contrasting footing. To that end, I picked purple heart for the footing wood.
Next I select a straight 11/32 shaft. As this was a to be a presentation arrow, spine is not an issue.
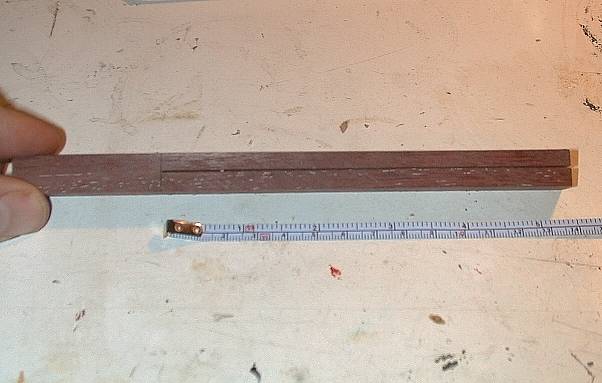
The first step is cut down the purple heart to a 1/2 by 1/2 by 7 inch billet. The cut a slot using a coping saw or band saw, 5 1/2 inches log down the center of the billet. the end result should look like this.
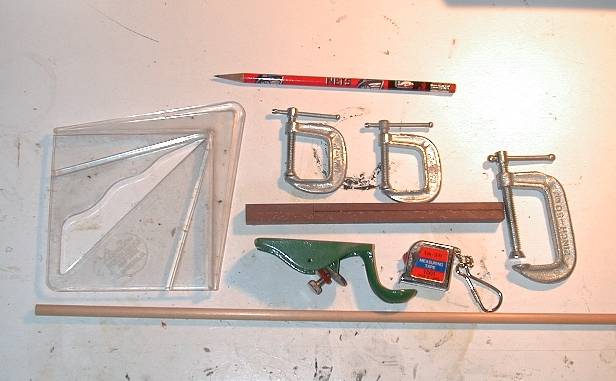
Next gather all your tools for the assembly steps. You will need.........
Your Billet
An Arrow Shaft
Four Small C-Clamps (three shown)
A Ruler or Tape measure
A Thumb Plane
A Pencil
A Center Locating Tool
Wood Glue (not shown)
Fine Sand Paper (not shown)
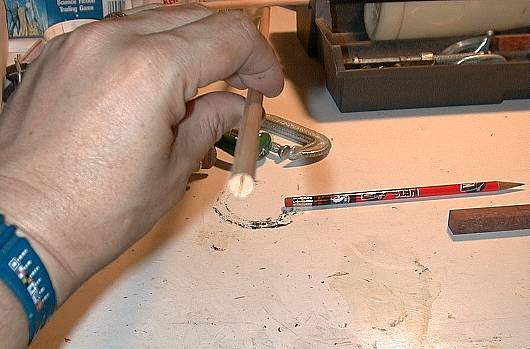
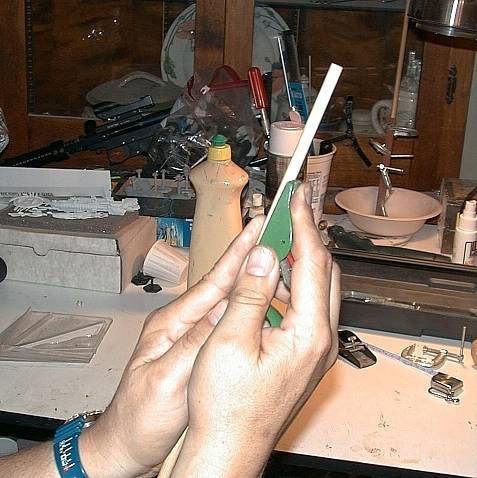
Use your center locating tool to draw a center line across the end of the shaft. Make sure your center line is parallel to the grain of the wood.
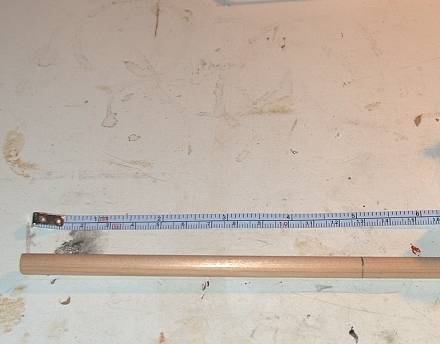
Next mark your arrow shaft 5 inches from the end with the center line on it. This is 1/2 inch shorter then the slot in your billet.
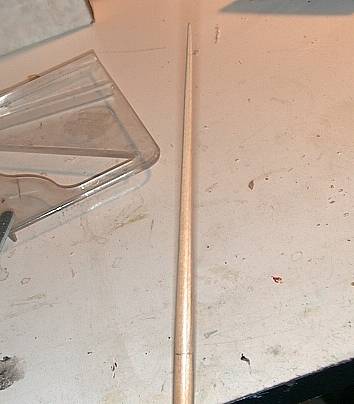
Now use your thumb plane to cut a taper from your 5 inch mark to the end. Alternate sides with the thumb plane after every cut, to make your taper uniform. After you have cut your taper, gently sand the surface. This is going to be gluing surface, so the straighter it is the better.
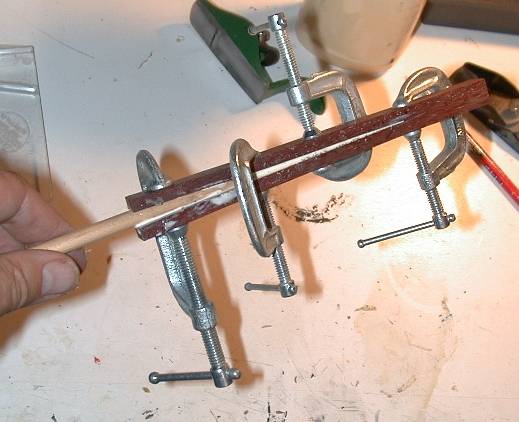
After the taper is cut, comes the hard part. You need to glue the billet to the tapered portion of the shaft. To do this first start by clamping the billet just below the cut. This will keep the billet from splitting, while you a driving the taper into it. Next, inject glue in the the cut of the billet and cover both sides of the taper with glue. This is a messy job, so cover your floor with paper. With glue on both pieces push the taper into the cut of the billet, spreading the billet as you go. You may need a small hammer to gently drive the shaft in all the way. Make sure the shaft has gone into the billet straight. After this you can't correct it, if the joint is not straight. Then wipe off as much excess glue as you can and clamp the joint with your remaining three clamps. Allow the glue joint to dry over night.
After allowing the glue to dry you will be using a lathe to turn the billet round to match the shaft diameter. So the next step is apply masking tape to the shaft to protect it from the jaws of the lathe chuck as much as possible.
Using a machinists lathe with a hollow mandrel, chuck up the shaft, just tight enough to hold it steady. You will need to take small cuts, so you should not need to tighten the chuck too much. make sure you clamp the chuck on your masking tape, to protect the shaft.
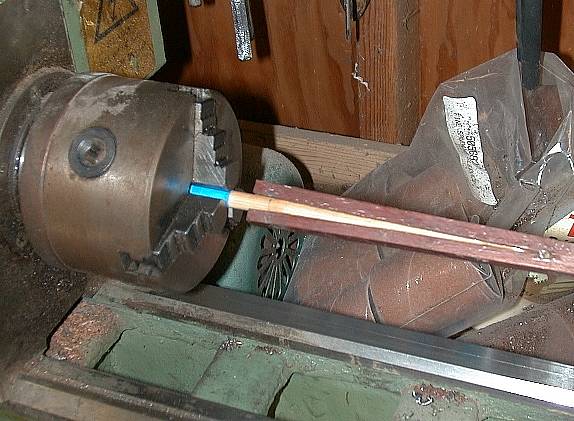
Turn the shaft taking small cuts. By taking too large of a cut you risk cracking the wings of the footing off.
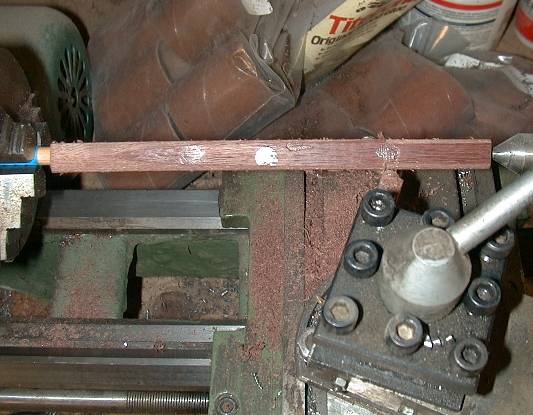
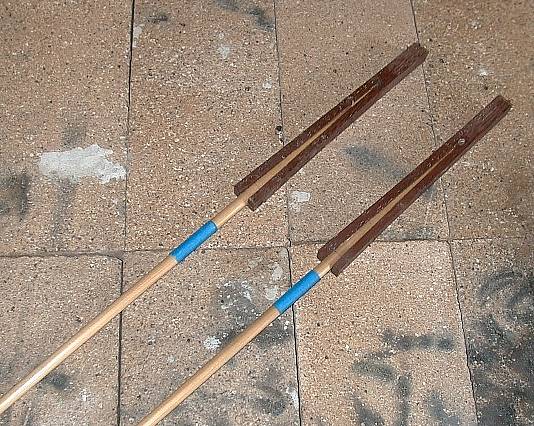
This is what the footing looks like when you are done turning it. The next step is the lightly sand the footing and finish the arrow as normal. Be very careful when sanding the footing. The cedar shaft is much softer then the footing wood. So it is very easy to sand an unintended flat into the shaft.
For More Information Contact the Author via e-mail.