 |
 |
 |
 |
| Lord Ian's Burgonet |
Senor Andre's Morion and Burgonet |
Don Giacomo's Maximilian |
The Authors Burgonet |
The Helmet Project
This page last updated 09/18/2003
Click on thumbnails for full size image.
The purpose of this page is to document the process by which several period style helms, arrived on the rapier field in Caid. This project currently involves Don Giacomo Cavalli da Treviso, Senor Andre Rodriguez de la Rosa, Lord Ian McKinney and myself.
In the shop right now are five helms. Three burgonets, a maximilian and a high combed morion. My burgonet helm came from Sarco, Inc. They advertise, their reproduction helms in Shotgun News. All of the other helms came from Harshad Daswani in India. They were imported by Travis Walker, who past them through at his cost to SCA members. As a result my helm cost a great deal more then the others.
Unmodified helm photos
|
|
|
|
| Lord Ian's Burgonet |
Senor Andre's Morion and Burgonet |
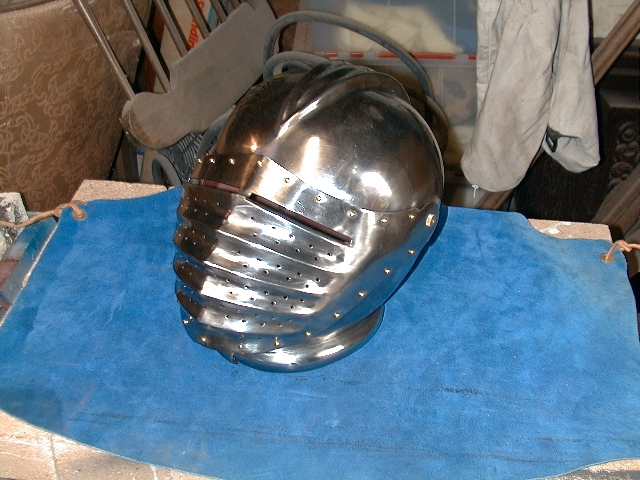
Don Giacomo's Maximilian |
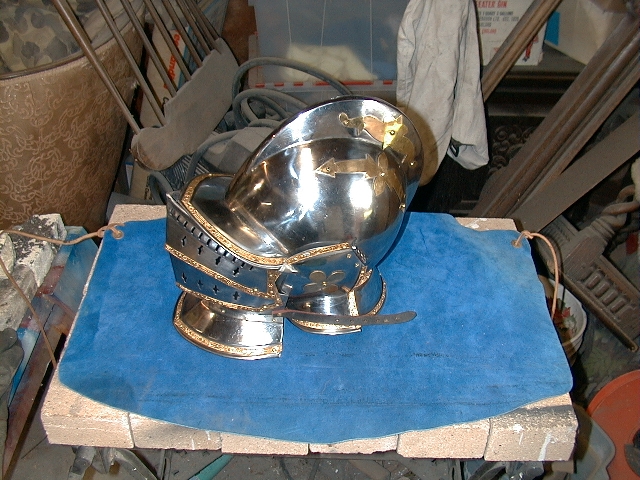
The Authors Burgonet |
The first step in this project for all of the helms is to repair the basic helm. My burgonet arrived with one of the rivets that hold the cheek piece to hinge, being popped. To repair this I brazed the hinge back on to the cheek piece. The other two burgonets, had long screws sticking into the helmet, that needed to be cut off and smoothed. Andre's morion, had cracks all along the weld at the top of the comb. This required some extensive repair. The cracks were caused by the sheet metal being too thin in places. So the challenge was weld these cracks closed without burning through the thin metal. Don Giacomos, maximilian is bent out of shape. It also appears to have the mounting holes for the visor, in the wrong place.
 |
 |
 |
 |
|||
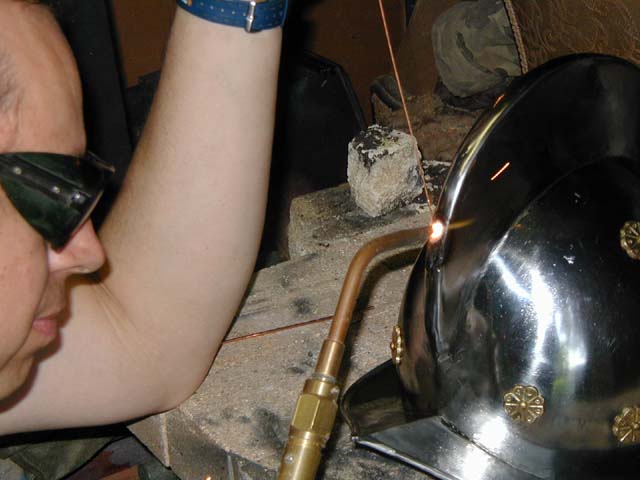
| Photo's courtesy of Senor Andre Rodriguez de la
Rosa First photo shows the damage to one section of the comb. A very small flame a thin rod were required. Followed by a light touch with the grinding a polishing wheels. |
||||||
The first helm to be modified was Andre's morion. This being an open face helm, the procedure is relatively straight forward. We are not replacing any existing portions of the helm. Rather what is required is to attached a rigid face shield to front of the helmet's brim. (Photo's courtesy of Senor Andre Rodriguez de la Rosa)
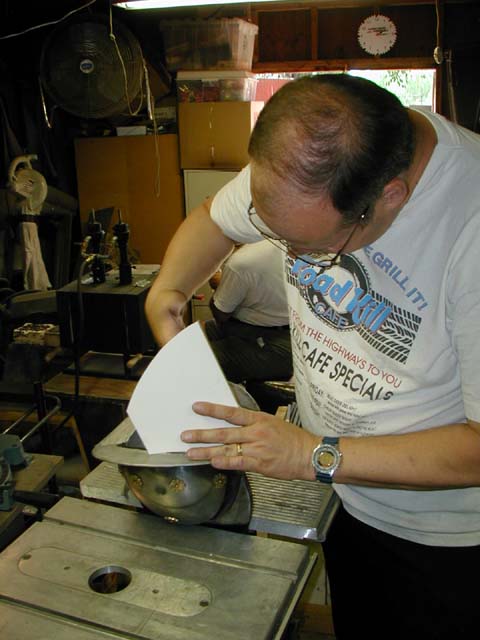 We start with a paper pattern. We used
poster board to give the pattern some body. The first step in making the pattern
was to trace the contour of brim. We did this by taping a piece of poster board,
inside the crown of the helm and drawing a pencil line along the brim
We start with a paper pattern. We used
poster board to give the pattern some body. The first step in making the pattern
was to trace the contour of brim. We did this by taping a piece of poster board,
inside the crown of the helm and drawing a pencil line along the brim
. After cutting that line, we transferred the pattern to a larger piece of poster board (several paper patterns were required before we committed to cutting metal). While transferring the pattern, we also altered the angle of the face shield 5 degrees inward (this would be done one more time, for a total of a 10 degree inward angle).
Next we established the shape and coverage of the face shield. This took several versions of the pattern before we were satisfied. The last step on the paper pattern was to add excess material to the top edge. This is to produce the tabs which will be folded over and be used to attach the face shield to the helm.
Once the paper pattern is complete, it is time cut metal. The metal used for this project is 16ga perforated steel. The SCA and kingdom rules are very specific about this material. The perforated steel for all the helms comes from McMaster-Carr, www.mcmaster.com. The specification for the steel is as follows.
McMaster-Carr Part number: 9255T631.
Size is 36"X40" sheet.
Hole diameter is .125" (1/8")
pattern: staggered
center-center measure: .1875" (3/16")
thickness: .060 (16g.)
Cost: $37.55 a sheet
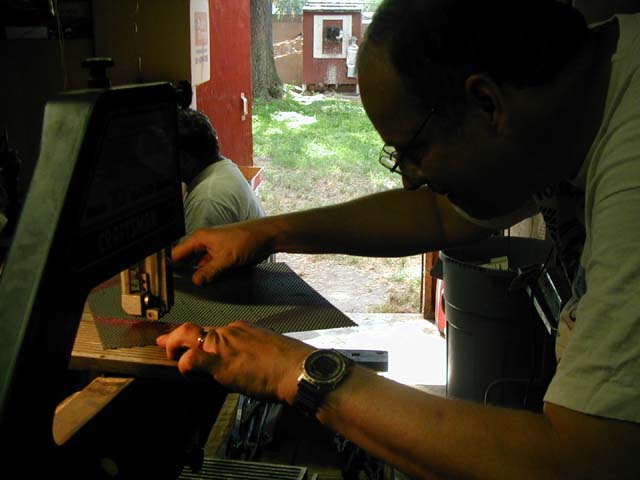
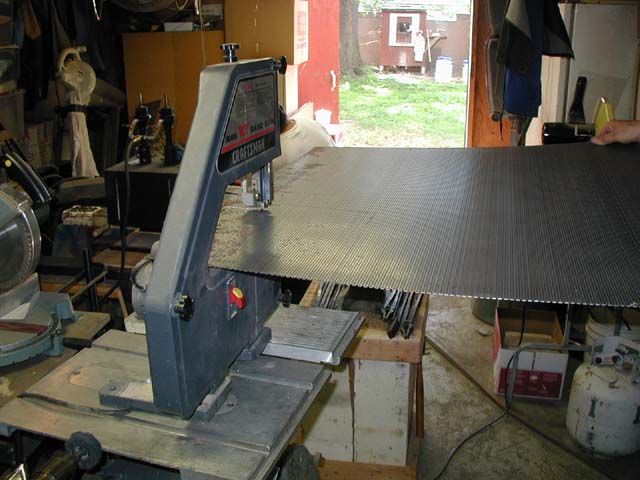 As you can see above this is a pretty
large sheet of steel, enough for several helms. So, the first step is cut the
steel down to a workable size. All the cuts will be made with my three wheel
band saw and a metal cutting blade. This is just barely enough saw for the
job.
As you can see above this is a pretty
large sheet of steel, enough for several helms. So, the first step is cut the
steel down to a workable size. All the cuts will be made with my three wheel
band saw and a metal cutting blade. This is just barely enough saw for the
job.
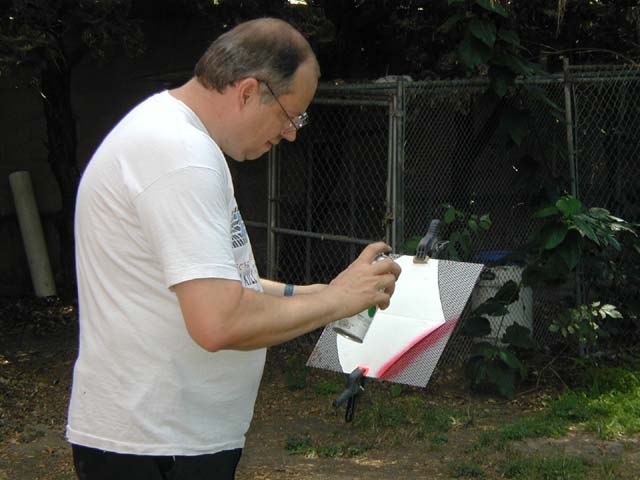
 Next the pattern is transferred to the
steel. In cutting the steel down to a workable size I found I could not see a
pencil line very well at all on the perforated metal. So the pattern was clamped
metal and spray paint was used to make the line show up in sharp contrast (sort
of like painting a stencil).
Next the pattern is transferred to the
steel. In cutting the steel down to a workable size I found I could not see a
pencil line very well at all on the perforated metal. So the pattern was clamped
metal and spray paint was used to make the line show up in sharp contrast (sort
of like painting a stencil).
 Using the band saw once again I cut away
everything that wasn't a face shield. Next I used the disk sander to clean up
the curve on the base of the face shield.
Using the band saw once again I cut away
everything that wasn't a face shield. Next I used the disk sander to clean up
the curve on the base of the face shield.
With the face shield cut out, it is now time to bend it to shape. First I start by using my hands and the edge of my anvil to put the crease down the center. Next I clamped the sides to a large diameter pipe and cold bent the curves to bring the shield around towards the ears.
 The last power tool to be used here is
a dremill with a composite cutting wheel. This is used to cut the slots that
allow the tabs to be bent over.
The last power tool to be used here is
a dremill with a composite cutting wheel. This is used to cut the slots that
allow the tabs to be bent over.

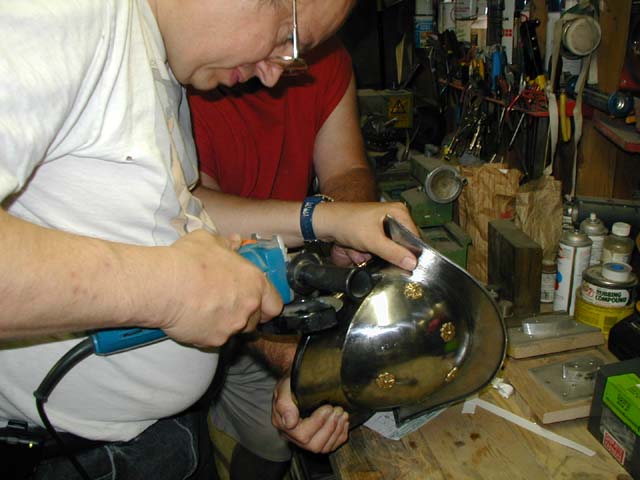
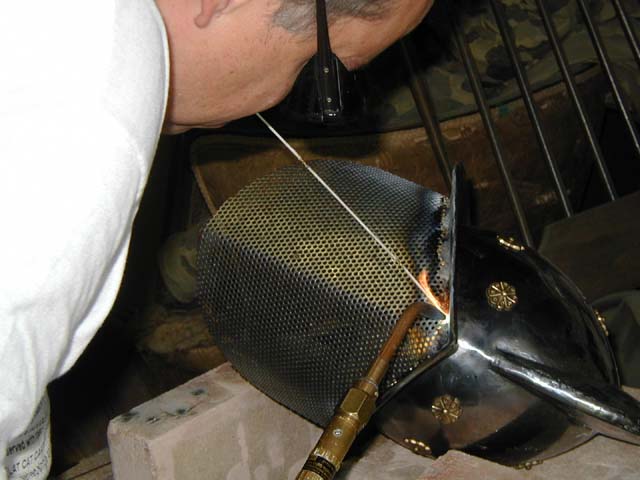 Once the tabs are bent over, the helm is
propped up and the face shield is set in place. Next the face shield is brazed
to the brim of the helm. Brazing is used instead of a weld due to the very thin
steel of the helm. The perforated steel in 16 gauge while the helm is 20 gauge.
Brazing should be more then strong enough and prevents the risk of burning
through the thinner sheet steel of the helm.
Once the tabs are bent over, the helm is
propped up and the face shield is set in place. Next the face shield is brazed
to the brim of the helm. Brazing is used instead of a weld due to the very thin
steel of the helm. The perforated steel in 16 gauge while the helm is 20 gauge.
Brazing should be more then strong enough and prevents the risk of burning
through the thinner sheet steel of the helm.
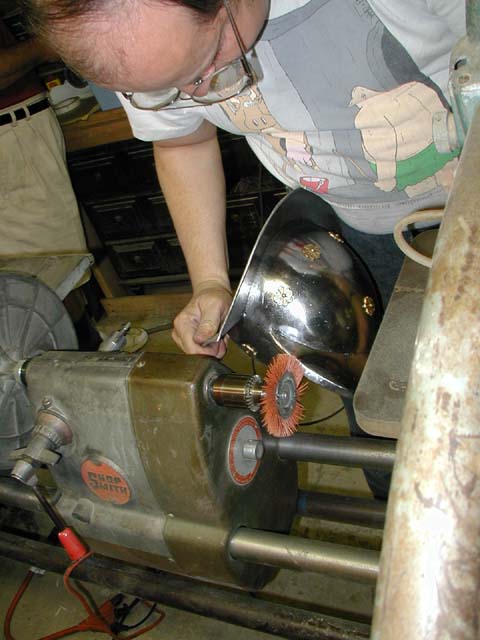
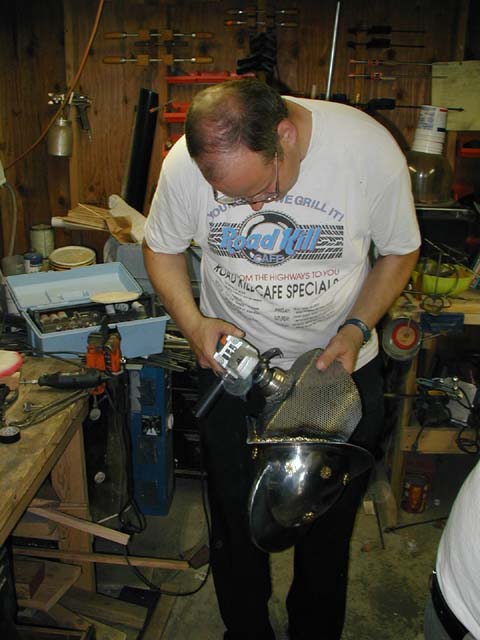 After the shield is brazed the helm gets
a rough machine polish and is handed back to Senor Andre for him to complete. At
this point all that is required to complete the helm, is to add a suspension
harness and a chin strap with ear flaps. The edges of the face shield
should also be covered by wrapping some leather around them.
After the shield is brazed the helm gets
a rough machine polish and is handed back to Senor Andre for him to complete. At
this point all that is required to complete the helm, is to add a suspension
harness and a chin strap with ear flaps. The edges of the face shield
should also be covered by wrapping some leather around them.
Continue on to Part Two (Eion's Burgonet)
For more information Contact the Author via e-mail.