 |
| Lord Eoin's Burgonet |
The Helmet Project
(Part Two)
This page last updated 09/17/2003
Click on thumbnails for full size image.
The purpose of this page is to document the process by which several period style helms, arrived on the rapier field in Caid. This page currently involves converting the helm of Lord Eoin McKinney.
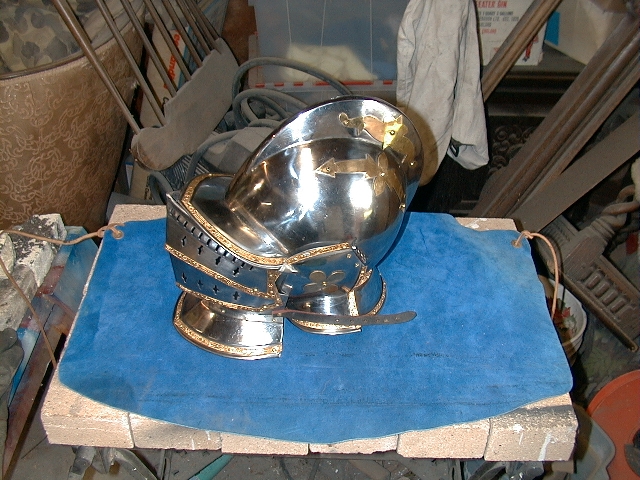
Unmodified helm photo
|
| Lord Eoin's Burgonet |
The first step in this project is to repair the basic helm. Eoin's burgonet arrived with a serious problems with the helms geometry. The face plate did not mate with the helm body at all correctly. To correct this we had to remove the visor lames and change the angle down the midline of the chin piece. This was done partially cutting the chin piece apart, down the center, bending it a re-welding again.
Once the repair was complete, it suggested how to proceed with the rest of the project. The plan is use the visor lames as patterns to create duplicates in perf metal. The lower lame can be reproduced exactly. While the upper lame needs to be modified for an exact fit to bill of the helmet. So first the two lames are separated. Then the brass trim pieces are remove and saved to be used on the new lames. Last the lames are flattened out on the anvil to create the pattern pieces
Once the pattern is complete, it is time cut metal. The metal used for this project is 16ga perforated steel. The SCA and kingdom rules are very specific about this material. The perforated steel for all the helms comes from McMaster-Carr, www.mcmaster.com. The specification for the steel is as follows.
McMaster-Carr Part number: 9255T631.
Size is 36"X40" sheet.
Hole diameter is .125" (1/8")
pattern: staggered
center-center measure: .1875" (3/16")
thickness: .060 (16g.)
Cost: $37.55 a sheet
 The pattern is transferred to the
steel. In cutting the steel down to a workable size I found I could not see a
pencil line very well at all on the perforated metal. So the pattern was clamped
to the perf metal and spray paint was used to make the line show up in sharp contrast (sort
of like painting a stencil). Using the band saw Eion cut away
everything that wasn't part of the lower lame. Next he used the belt grinder to clean up
the edges of the lame.
The pattern is transferred to the
steel. In cutting the steel down to a workable size I found I could not see a
pencil line very well at all on the perforated metal. So the pattern was clamped
to the perf metal and spray paint was used to make the line show up in sharp contrast (sort
of like painting a stencil). Using the band saw Eion cut away
everything that wasn't part of the lower lame. Next he used the belt grinder to clean up
the edges of the lame.
With the lame cut out, it is now time to bend it to shape. First I start by using my hands and the edge of my anvil to put the crease down the center. Then I added the required curves be hand and eye. All this geometry will be further refined when we mount the first lames to the chin piece.
Next Eion used small copper rivets to attached the brass trim removed above, to the new perf metal lame. I feel that keeping this trim is very important to the period appearance of the helm.
Last holes were drilled through the lame and the chin piece to act as hinge points. The holes in the lame are drilled a little over size to allow the lame to move after the rivets are peaned. Steel rivets are used here because copper or brass rivets would wear away during use. With the lower lame attached, the assembly looks like the photos below. With this done, we can now move on to forming the upper lame knowing what the exact geometry need to be wear it attaches to the lower lame.
 |
 |
| Lower Lame in down possition | Lower lame up and locked |
For more information Contact the Author via e-mail.