 |
Making A Pattern Welded |
 |
|
Making A Pattern Welded |
|
Page Last Updated 07/29/2004
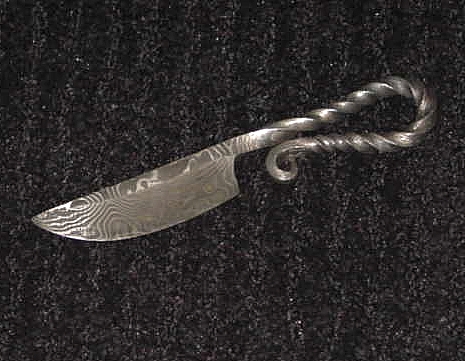
It all started with a bad ladder pattern billet. I had to cut off three inches due to a bad weld. I then made a six inch dagger from the remainder. My first ladder pattern knife. Now not wanting to waste the piece I cut off I tossed it in my bucket of odd-ball bits and pieces. A few weeks later I was a at the Poppy Festival in Lancaster CA, and I was looking for something to demo. Recalling a knife that my wife bought from some Viking historic recreation craftsmen. I split that scrap piece in two and decided to see if I could make this little utility blade. And I have been making them ever since.
I started out making these out of leftover scrap pattern weld (You don't just throw this stuff away). But since then, these knives have become my number one seller. And I am now making billets specifically to cut up and turn into these knives.
That being the case, my
first step is to make the billet. The steel I use for these knives now is a 40+
layer random pattern. In reality I use a straight laminate. But as these blades
are forged to shape, the pattern is greatly deformed. So there really is no
reason to use any other pattern. To start I cut and stack my layers. I used one
inch wide by six inch long pieces of .040" 1095 steel and .004" nickel
foil. Stacked an inch high. 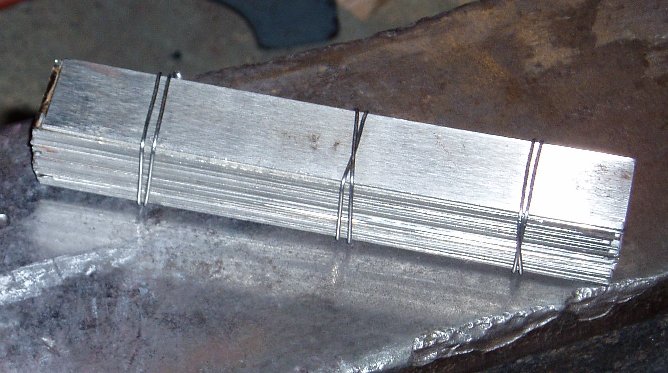
Once I weld this up and draw it down to just over
1/4" thick, I will get about a 8.5"x1.25"x.375" bar that I will cut
into four pieces.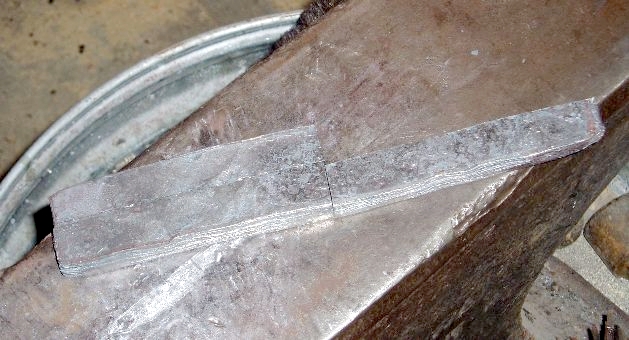
(note one piece has already been used from this bar)
After I have welded and cut my bar, its time for the first forming operation. After bringing my bar up to heat, I begin the forming by drawing the handle out of half my piece of steel. Working with a straight peen hammer and what will become the spine of the blade against the anvil face, I draw out a square shaft that begins at about .25"x .25" and tapers to a point. Drawing out about half the bar will give you a handle shaft around 8-9" in length.
I then reverse my grip on the piece and start to forge the blade area. I start this by placing the blade spine on the anvil face and round the point of the blade. I then move the blade to the anvil horn and likely curve the piece. I then light forge the edge bevels, which will curve the the blade a little more. But don't forge the edge bevels all the way. You want to do a fair amount of grinding across the layers to show them off in the finished blade.
Last for this
operation, I
normalize the blade three times, and then allow it to slowly cool down. But I
don't try to anneal the piece. I won't be doing enough grinding that this will
become an issue at all.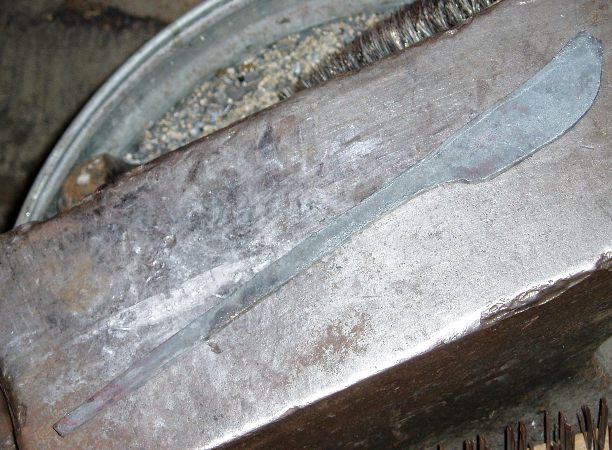
Next it is on to the
grinder. First I clean-up the transition from the blade to the handle. I like to
make this a 90 degree angle that is slightly rounded (.25" radius) at the
transition. 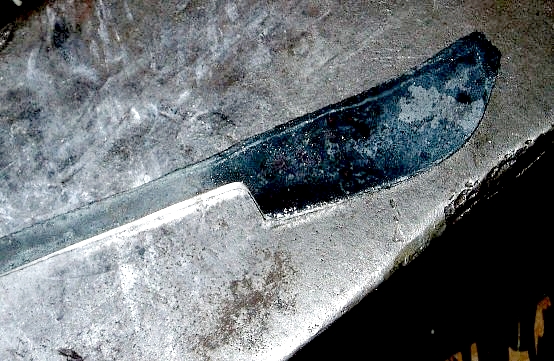
Then I move on the the handle. I square it up and then smooth out
the taper. The last thing I do on the handle is take it to a high polish. Because
after it is twisted and bent, this area will be very hard to reach with anything
other then a wire brush. 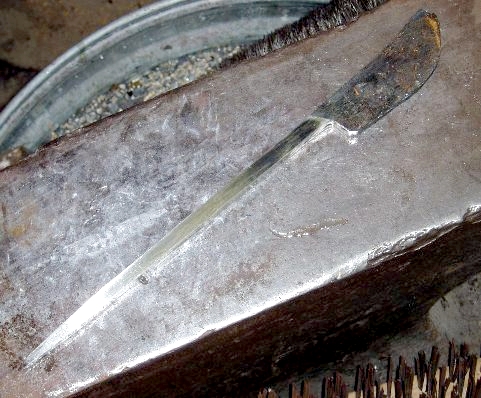
After the handle area is done I clean up the blade
profiles and grind the bevels. I leave this area a little thick prior to heat
treating and only take it to the 240 grit stage.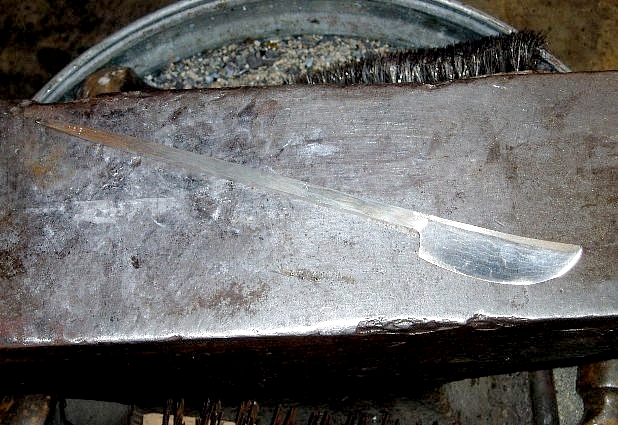
Now it's back to the
forge for the final forming a heat treating operations. For these steps I won't
be using the hammer at all except for maybe a (sacrificial) wood mallet for
straightening. First off I'll preheat my forge. While that is happing I'll set
my post vise so it will grip the blade with only a slight turn of the handle.
I'll also adjust the wrench that is my twisting tool to grab the handle shaft an
inch or so from the end. I then heat up my handle area to a nice bright cherry,
clamp the blade in the vise and use the twisting tool to put a nice spiral twist
on the handle. I may need up to three heats to get the twist I want. But I try
to do it in one or two to limit scale build-up. 
I then heat up just the end of
the handle and use my scroll pliers to turn the end up towards the spine into a
nice scroll.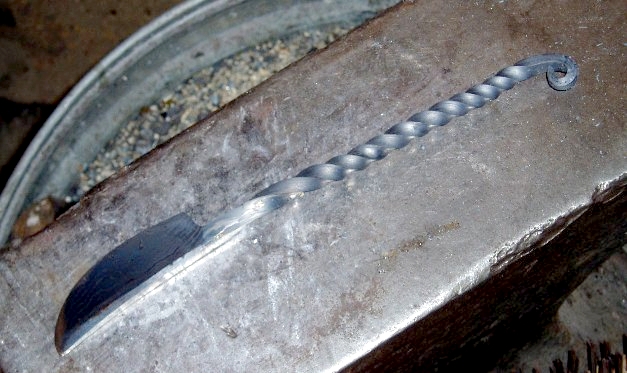
Last for the forming operations I clamp up a 1/2" or 3/4"
pipe in the vise. I then heat the handle and bend it around this pipe. Taking
the scrolled end back towards the blade side, forming the handle loop. After
this I do any straightening at a dull red heat and use a wood mallet against the
anvil stump (or a wood block placed on the anvil), not the anvil face. This way
I should not damage the ridges of the twist. I then heat treat the whole thing
as per normal. 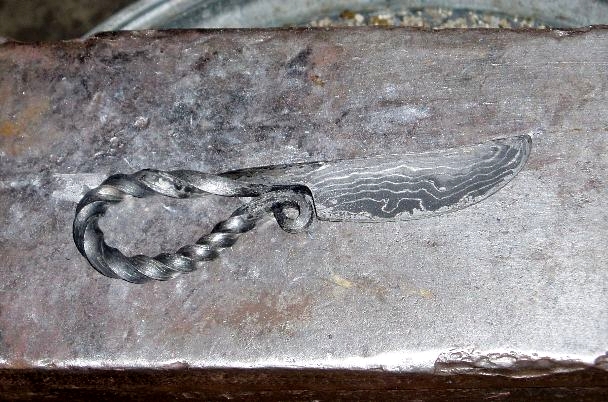
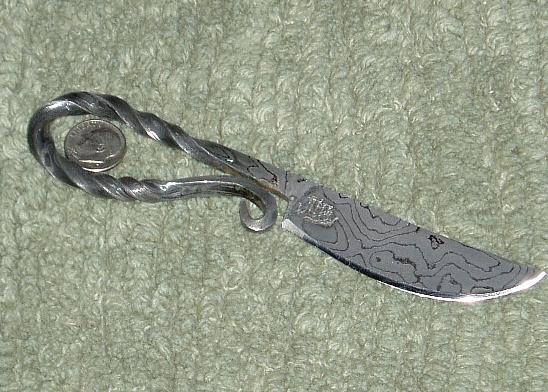
At this point I attack the handle with a wire brush. I want to break away any scale the formed and remained thru these operations. I start with a hand brush to get as much as I can. I then use a Dremel tool and a flat wire wheel to finish this clean-up. I don't use a cup wheel, because it can scratch the ridges of the twist. instead I use the flat wire wheel and run it so any scratches run parallel to the twist. Then it's back to the grinder.
At the grinder I start with the 240 grit belt and finish out the bevels. I then switch to the 400 grit belt and start the blade polish. Use extra care not the run the belt grinder into the handle twists. After the 400 grit belt I buff the entire knife (handle included). And last I etch the knife to develop the pattern and then mark the finished knife.
Contact the maker via e-mail.