San Mai Japanese Style Chefs Knives
A step by step demonstration
This page last updated 07/08/04
Click on thumbnail images to view the full sized photo.
At two upcoming SCA events there are to be fund raising raffles. One is for the Shire of Heatherwyne and the other for the Kingdom Newsletter, the Crown Prints. To that end I have decide to make a set of two knives to be raffled off, one each, at the two events. So this page is to publicize those raffles and to explain the knife making process behind these raffle prizes.
The two Knives will be based on Japanese style chefs knives. One is to be a chopper and the other a more generic Japanese chefs knife.
Both knives will be of laminated welded construction of three layers. This style of construction is called "san mai", meaning 3-layer in Japanese. This is not to be confused with "ori awasi san mai" construction. Ori awasi san mai blades have a hard steel edge piece topped by mild steel or iron on the spine of the blade, sandwiched between two mild steel or iron layers. So when viewed from the top all you see is the mild steel or iron. No weld line should be visible along the blades spine. The san mai construction I'm using is just a simple sandwich of three layers. So the high carbon center should be clearly visible between the mild steel layers, when looking down on the spine of the blade.
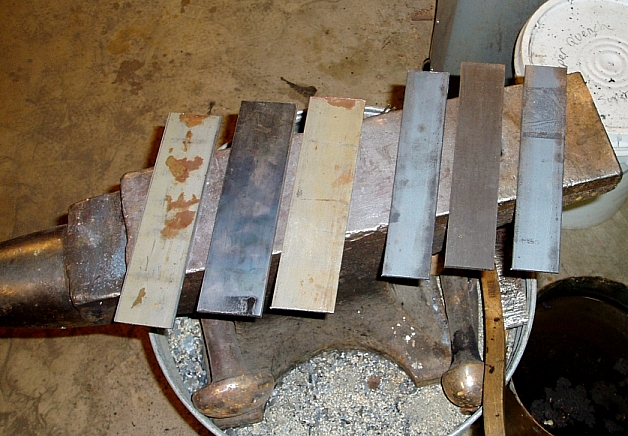
So the first step to the
project is the assembling of my
billets. Prior to welding all my steel will be cut to eight inches in length. For
my chefs knife I will start with 1 1/2" wide steel and on the chopper I
will use 2" wide steel. My core layer is a 3/16" thick piece of CR-1095 steel and my
outer layers will be 1/8" thick CR-1018 steel
The next step is to clean up
the steel, removing any rust, scale or paint using my belt grinder. The billets are clamped up
and then secured with Stainless steel wire. Stainless steel is used, because it
welds at a much higher temperature and can be cut away once the ends of my billet
are welded. 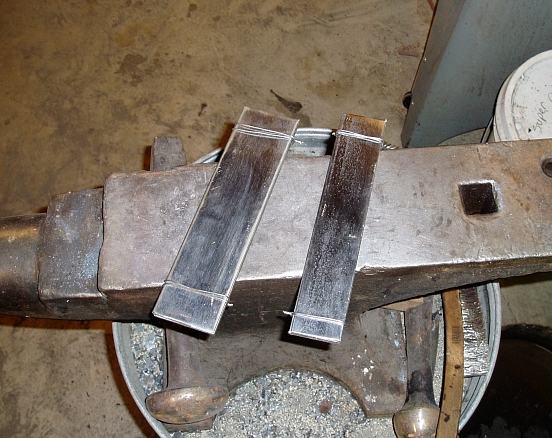
Next, my cleaned and wired
billets are placed in a saturated solution of borax and water. This will cause some
of the borax flux to penetrate all the way through between the layers of the
billet. This is especially important with these wide pieces of steel. Merely
fluxing the edge of the billet, when hot, may not allow the flux to penetrate all
the way across the surfaces to be welded. The flux and water solution will
penetrate all the way. And in addition to that benefit, I will use less flux
overall during the forge welding, which will greatly extend the life of my forge lining
and the sacrificial floor. 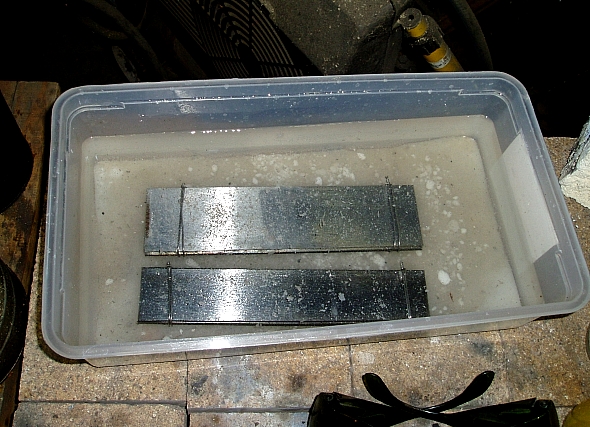
Now, its off to the forge to
weld the billets. On this first evening of work on this project, I only had time to weld the 1 1/2"
wide billet. With only three layers, the bottom layer give up it's heat very
quickly to the anvil. So I ran two welding courses, one on each side of the
billet to make sure I got two nice and solid welds. I then normalized the steel
before stopping work for the first night. And this is what I have so far.  And that's the end of the first nights work.
On the second night I had
about an hour to work in the shop. So I first welded up the 2" wide billet.
I then normalized it and set it aside to cool. While that billet was cooling I
worked on the 1 1/2" billet. This billet will be for the traditional chefs
knife. So I forged out the basic profile. After doing that I used the band saw
to cut out the tang. Normally I would forge these areas out. But there was so
much metal to be moved, this time it was much faster to use the bandsaw. Last I
rounded the tip of my chopper and cleaned up the profile of my chefs knife on
the grinder. So now they look like this.  And that's it for the night 2 in the shop.
The next two shop sessions
resulted in my doing the grinding on the knife for the Heatherwyne Anniversary
raffle (the chopper). While grinding I found a bad weld on one side of the
chopper. Fortunately it was the correct side to allow me to modify the design. I
ground off the mild steel on the left side of the blade and did a chisel grind on
the right side of the blade. This allowed me to make it Kataha (two layer) style
blade. So I finished the grinding, heat treaded the blade (edge hardened) and
finish up the machine polish. So now the knife looks like this (sorry for the
poor contrast) 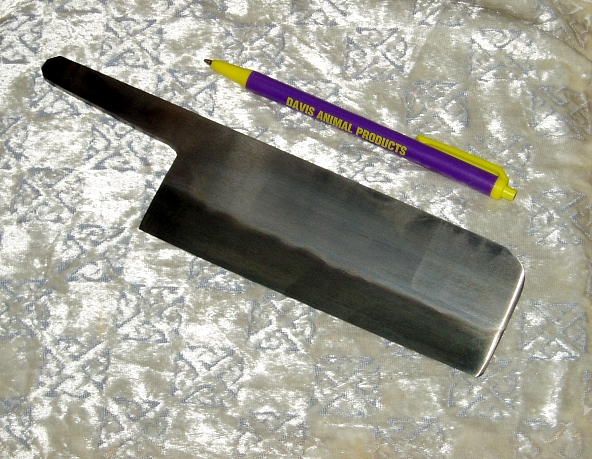 The blade area is about 2 by 6 inches.
Next I have to add the handle
and then do much hand polishing while watching the TV. And there is very good
news on the handle material. In looking for traditional Japanese Ho wood, I have
found that in this country it is called White Camphor. And that tree is used decoratively
in the southern states and Hawaii. Well a friends neighbor cut down a Camphor tree a few
years back and I got some short logs that I have been drying all this
time. Now, I don't know if this is white camphor, but in cutting the logs open I
found some pretty good looking wood. 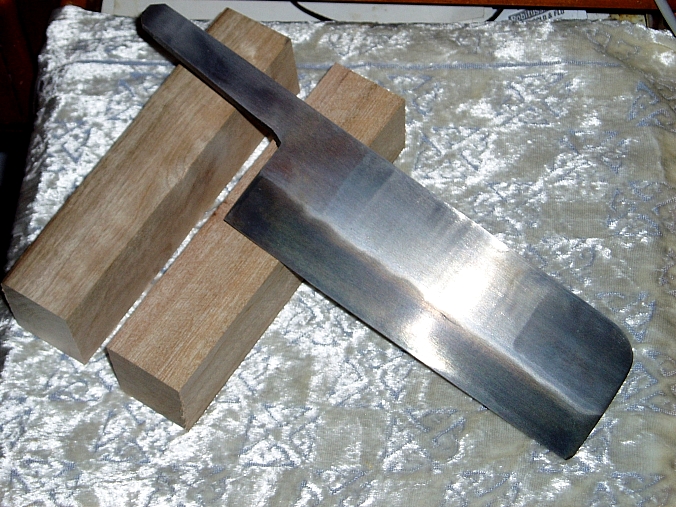
The first knife finished is
the Chinese chopper. First I drilled three holes in the
end of my handle block. Then I heated up the tang of the knife and used it to
open up the slot by burning away the excess material. Next I cut about 5/8"
length of 1/2" thin wall copper pipe. I then crushed it slightly to an oval
shape in my vise. Then marking the end of my handle block, I used the belt
grinder to turn down the end to an oval that the copper collar can fit over. The
collar was then fastened in place with epoxy. That was allowed to dry over
night. Once the epoxy was hard, I shaped the rest of the handle block. After applying
a Danish oil finish. The handle was was attached to the tang with epoxy. For a
finishing touch I added blue pigment to the epoxy and made sure to completely
fill in the end of the handle around the tang. This knife was raffled of at
Heatherwyne Anniversary on May 05/22/04.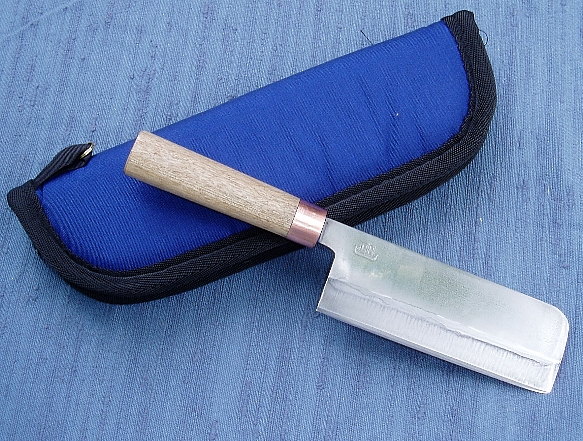
Next its on to the Japanese Chef's knife to be raffled off at CP Prize Tourney on June 10th. I went back and ran another welding course on the blade, to make sure I got a good weld on this one. I then polished the edges of the blade, to make sure I couldn't find any gaps in the weld around the outside of the blade. This knife is now ready for grinding.
Ok, finally got back to work
on this project with two weeks left before the second blade is auctioned off. So
this last weekend I ground a straight full width bevel on the left side of the
Japanese Chef's knife. I then chisel ground the right side of the blade.
Last I changed the angle on the spine to make up for the asymmetrical grind of
the blade. That completed the ruff grinding down to the 240 grit belt. And once
again I edge hardened the blade. A little clean up on the grinder and the blade
looks like this. 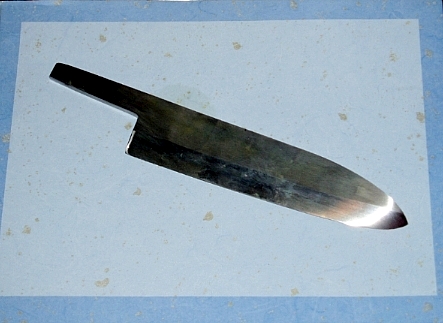 The bevels will need a little further refining before I start polishing the
blade.
The bevels will need a little further refining before I start polishing the
blade.
Over the Fourth of July
weekend, I made a great deal of progress. I did the final finish grinding of the
blade and then polished it. After that I lightly etched the blade in ferric
chloride. This etch shows off the weld lines from the three layers and also
shows off the edge temper. Last I made a handle from the black camphor like I
used on the other knife. I first cut in a step to fit the collar. Next I epoxied
the copper collar in place with clear epoxy. I then drilled and burned out the
slot for the tang into the handle. Shaping the rest of the handle block came
next and last I epoxied the blade tang into place, sealing the end grain of the
handle at the base of the blade, with blue pigmented epoxy. The knife is now
about 98 percent complete. Wednesday night I'll lightly hand sand the handle and
then hand polish the blade and copper collar. Last I use a Danish Oil finish on
the handle and then add my makers mark. 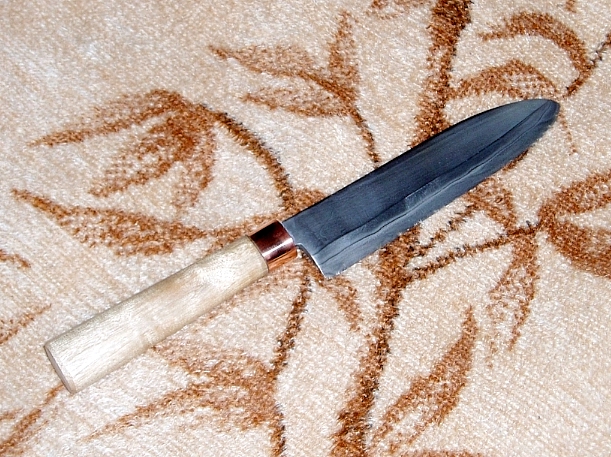 I should be able the hand the knife off to the Heatherwyne folks on
Thursday for the CP Prize Raffle.
I should be able the hand the knife off to the Heatherwyne folks on
Thursday for the CP Prize Raffle.
Tuesday July 6th, I had a knife club meeting. So all I got done was shortening the handle by about an inch. The balance and profile weren't exactly what I wanted. Taking the inch off the handle helped a lot in that regard and made it so the knife just fit in one of my 12" zipper cases. Tonight, Wednesday, I'll hand finish the handle and mark the blade.
Wednesday night I hand sanded the wood
handle and finished it with a rubbed in Danish Oil finish. I then electro-etched
my makers mark into the blade and did the final hand polish of the blade. This
being a working knife, the blade has matt finish. A mirror finish would not have
been appropriate. The overall length of the knife is about 11 inches. The blade
length is 6 5/8 inches. 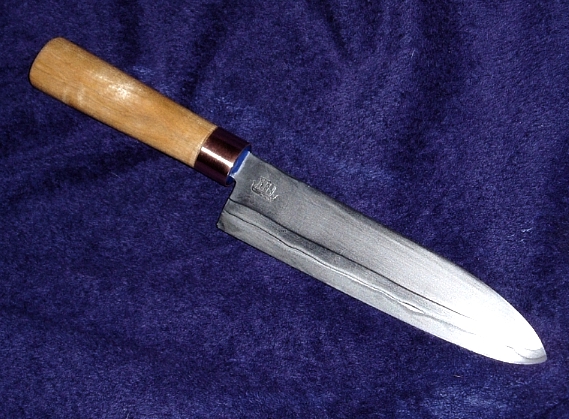
That completes the updates to this page. Both knives are now complete and on their way to new homes.