Steel rods or bar stock ( I use one 3' length of 1/4" stock and two 3' lengths of 3/16" stock)
Flat steel stock 1/8" x 3/4" by 1 foot (one foot is as small a chunk as you can get.)
Weld Rod
Tools needed
Torches or a forge ( I use two Mapp Gas torches)
Welding rig
Welding table
Bench grinder ( A stationary disk sander with coarse disk will work)
Wire Wheel for your grinder
Hand held grinder (die grinder or dremil)
Bench vise
Hack saw
Hammer
Small anvil
Vise grips or pliers
Steel ruler
Steel pipe nipples in various sizes to use as bending jigs
Phase One build the Frame
All of the rapier hilts I have made start with the same basic frame. The only variance in frame construction is the choice of Round or Square stock and decorative details.
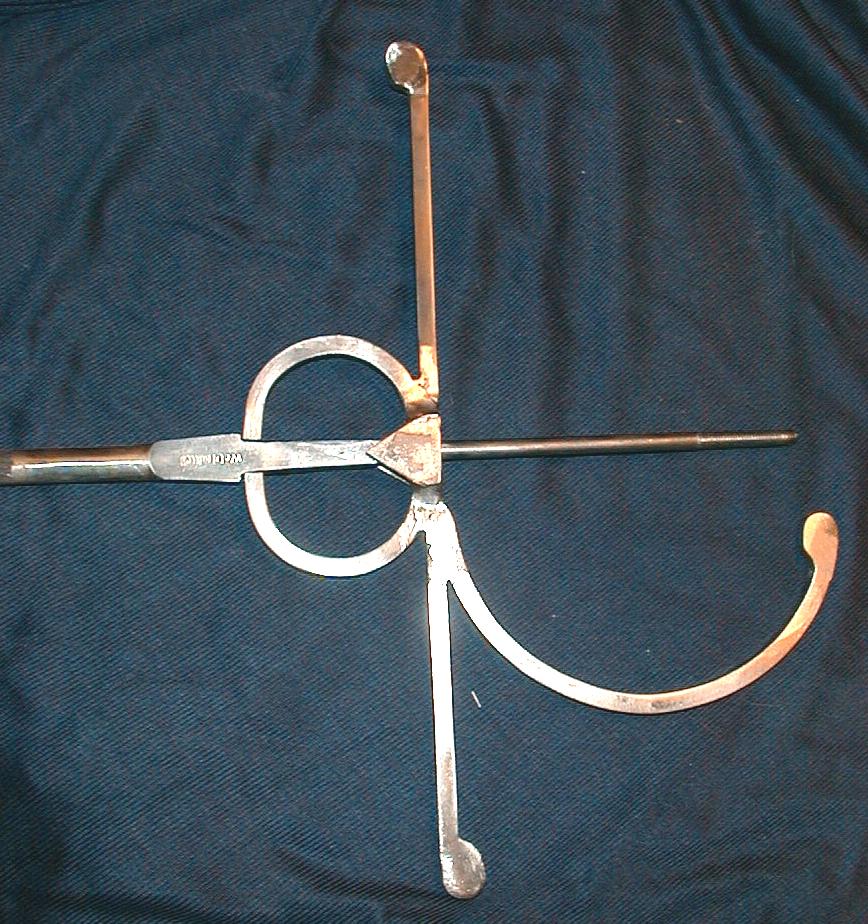
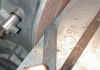
Frame for a false ricasso schlager hilt.
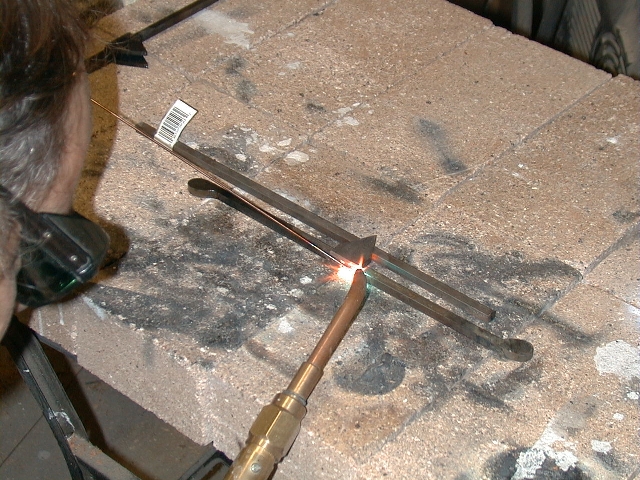
(Click on thumbnail to enlarge.)Step 1: Cut the quillions.
First, determine the overall length of the quillions. From this figure subtract the width of the tang at the point where it will pass thru the quillions. Divide this figure by two to arrive at the length of each quillion. Cut your 1/4" rod or bar stock to this length. Allow 1/2" to 3/4" extra if you want to reproduce the decorative details in the photo above. If you are going to include decoration, do so now, before proceeding to the next step.
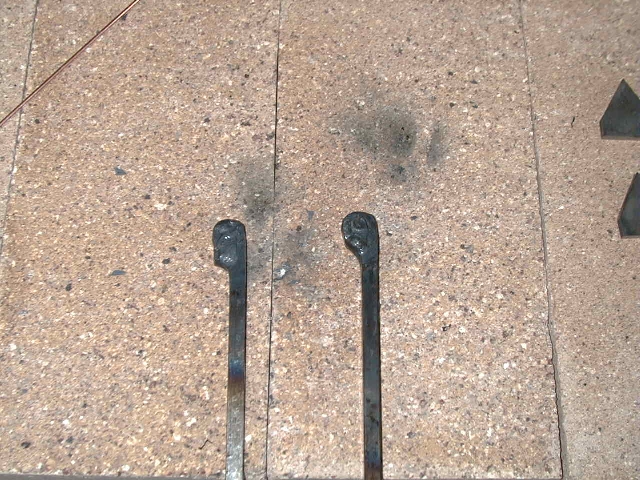
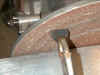
Step 1A: (optional) Decorative quillion ends
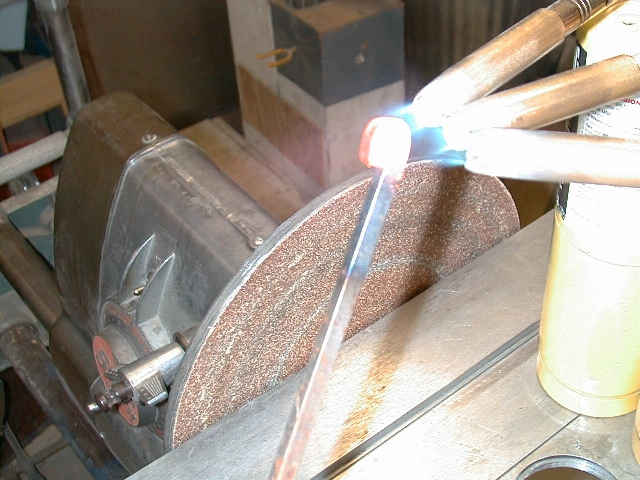
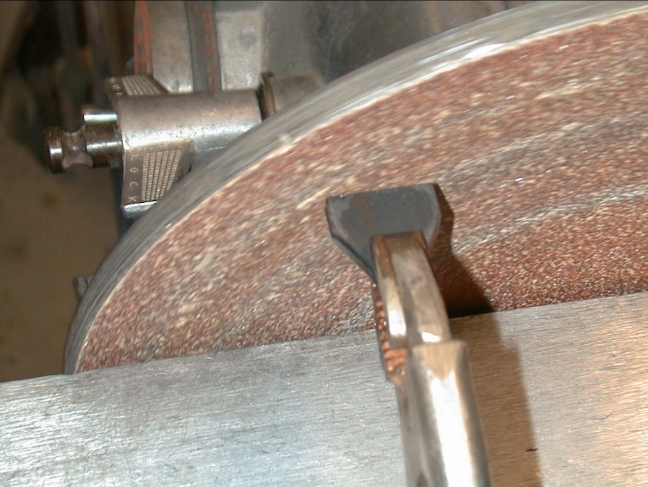
On, quillions made of square stock, I often add the following decoration. These instructions assume that you are using a MAPP gas torches as your heat source. If you have a forge, you can do the same thing using forge welding techniques. First set up your torches so to concentrate the heat into a very small area. Heat the end of your bar (while holding the other end in tongs). Once you have achieved a bright orange bending heat, bend the end over on your anvil. First bend it 90 degrees by placing it over the edge of the anvil and striking the end down with your hammer. Then reheat the bar and bend it the rest of the way while it sits on the face of your anvil. Once it is bent all the way over take the piece to your welding table and run a bead of metal down the seam. Cool the piece and grind it to it's final shape at the bench grinder.
Step 2: Make the pieces for the quillion block.
Determine how far you want the quillion block to protrude down the ricasso. The ad 1/2 inch to this figure. That is the final height of the quillion block. Next determine the shape of the quillion block. I normally make it house shaped. Take your flat stock to the bench grinder and form the upper shape of the quillion block, one on each end of the bar. Then use the hack saw to cut the two quillion block pieces to length, off the ends of the bar. Finally I clamp pairs of quillion blocks up with a set of vise grips. I then true the cut edges to each other and to final shape in the bench grinder.
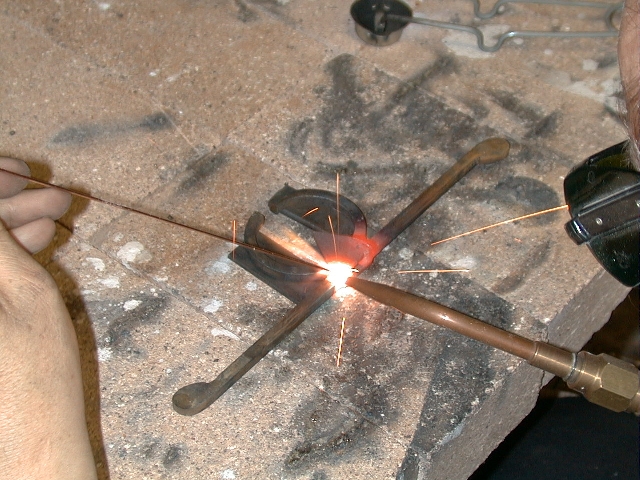
Step 3: Assemble the quillions.
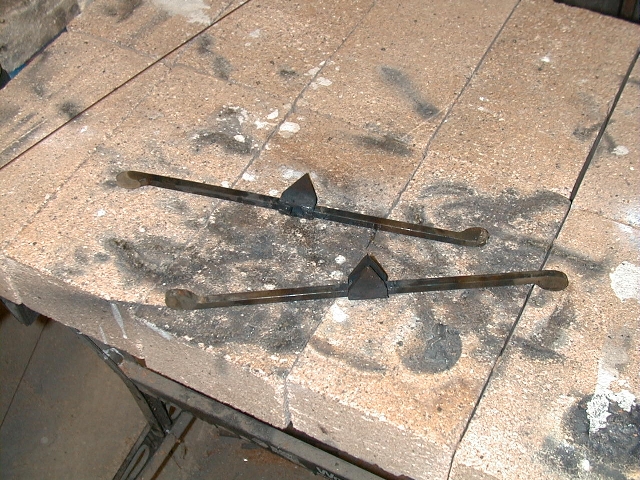
Take the quillion and the quillion block pieces to the welding table. Lay the two quillion pieces on their sides along a straight edge. Leave enough of a gap between the quillions for the tang of the blade to just fit. Be sure that you test the fit using the correct portion of the tang, depending on if you are mounting the blade false ricasso, or not. Remove the blade and straight edge without moving the quillion pieces. Place a scrap of the 1/4 inch material in front of the gap in the quillions. his will be used to help balance the quillion block pieces. Place first quillion block piece centered over the gap in the quillions. You are now ready for your first weld. Run a bead along the back of the assembly on both sides of the gap in the quillions. Also run a bead on both sides of the quillion block, on top of the assembly. Next cool the whole assembly and turn it over. Place the 1/4 inch scrap piece on top of the inside of the quillion block piece you just welded on. Place second quillion block piece on top of the assembly, lined up to match the one on the other side. Repeat the welds above. Remove the scrap stock and cool the assembly. Clean up your welds with the grinder and wire wheel. During this entire project, take the time to clean all your welds and do rough polishing after every step.
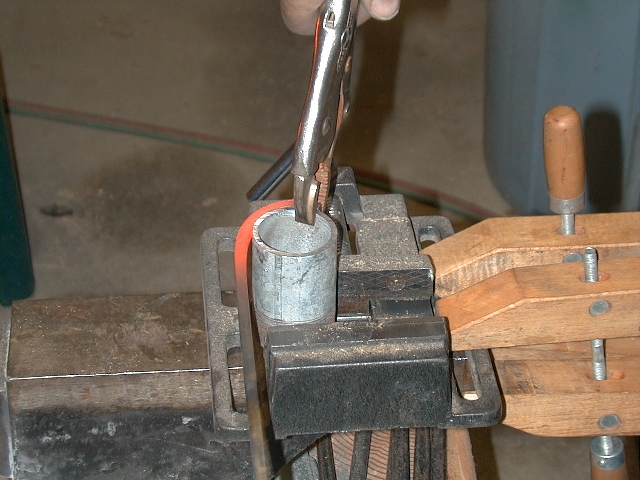
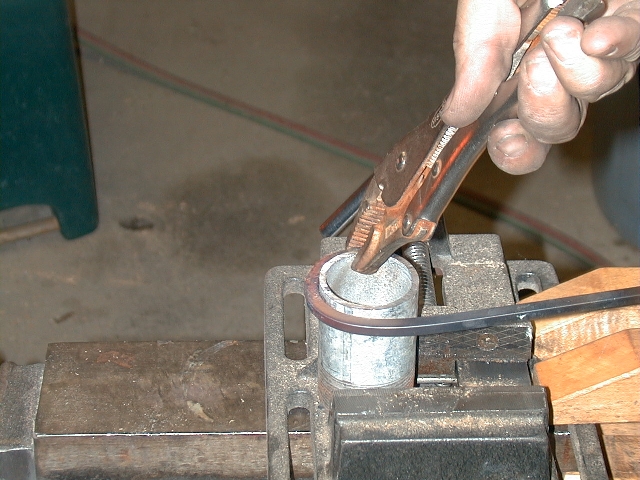
Step 4: Form the finger rings.
Clamp a piece of 1 1/2" diameter pipe in the bench vise or in a vise that is clamped to something solid. Heat your 1/4" bar or rod stock to a cherry red, using a forge or your torches. If you use torches, you will need to do this operation in several heats. Using your pliers or vise grips, clamp the end of the heated stock to the outside of the pipe and then bend the stock around the pipe. continue this operation until you have formed a 180 degree curve around the pipe. Cool the piece and the repeat the process, on the other end of the bar, to produce two 180 degree curves. Cut the curves off of the bar. Then take them to the grinder to clean up the ends. After you clean up the ends, use the bench grinder to create a flat section on the side of the curve that is going to be attached to the quillions. The length of this flat will determine the length of the weld bead. So make this flat at least 1/2" long.
Step 5: Attach the finger rings.
Take your quillions and finger rings back to the welding table. Lay the quillions on the table and then insert the tang of your blade. Position the finger rings so that the bases are against the tang, inside the quillion block. Position the tops of the finger rings so they meet the ricasso, or the tang under the shoulders of the blade, if you are mounting it false ricasso. You may need to shim the finger rings with scrap flat stock to bring them up to level, inside the quillion block. Carefully remove the blade without changing the position of any of the pieces. Then weld both finger rings in place by running a bead between the half rings and the quillions. Then run another pair of weld beads on top of the assembly between the quillion block and the finger rings. Cool the assembly and turn it over to repeat the welds on the other side. Cool the assembly once again and take it to grinder and the wire wheel to clean up the welds before proceeding to the next step.
Step 6: Form the knuckle bow.
The diameter of the form for the knuckle bow should be about the same as the length of the tang protruding past the quillions. That normally turns out to be about 6 inches. If you are going put any decorative details on the knuckle bow, do so before you bend it. To form the knuckle bow, bend it around a six inch pipe using the same procedure given above. Bend the knuckle bow only about 1/3 of the way around the pipe. Cut off the excess rod and clean up the ends of the knuckle bow on the grinder. Round one side if you don't have any decoration on the end, other wise leave that end alone. Grind the other end square. Once the ends are cleaned up, you will then grind a flat in the end that will attach to the quillions. Grind this flat perpendicular to the cord of the arc of the knuckle bow. The length of this flat will be the length of the weld bead, so grind until you have a 1/2" to 3/4" long flat.Step 7: Attach the knuckle bow.
Determine which of your quillions is the bottom one. From the center of the quillion assembly measure down this quillion the radius of your handle plus one finger width. This is the point at which the tip of the knuckle bow starts. Lay all the pieces on the welding table. Support the pieces as needed with scrap flat stock to make sure all the pieces are on the same level. Position the ground flat of the knuckle bow against the back surface of the lower quillion. Line the tip up with the mark you made above. Run a weld bead between the quillion and the knuckle bow. Cool the assembly, turn the piece over and run bead on the opposite side. Last, run a weld bead between the tip of the knuckle bow and the back of the quillion.Step 8: Finish the frame.
Cool off the whole assembly. Clean up all the welds at the Grinder and wire wheel. You must do all of your clean up grinding and rough polishing now, before you trap these areas with the rest of the hilt assembly. The time you spend here will show in the finished product. You are now finished with the frame portion of the hilt. Follow this link to complete an three ring swept hilt. Or, follow this link to complete a pappenheimer style hilt.