Njall's Work Shop
"It's a poor workman who blames his
tools"
(Anonymous)
"A good workman fixes them !"
(Njall Olaf Hagerson)
This page last updated on 07/20/2004
The purpose of this page is not to brag about my tool collection. Nor is it to say you need all these tools to do the projects listed on my site. Rather it is to provide some back ground on the tools used, if you decide to try one of the projects found here. Also if you are in the Southern California area, I will often allow other SCA members to work in my shop. In part this is to teach them the skills I have and to let them work on their own projects. In part it is also meant to motivate me. I do some of my best work, when I have someone else in the shop
.
What follows is a brief walk thru of my shop. It isn't much of a shop, but it's mine. The shop is set up in a back storage barn behind the kennel run by my wife and in-laws. Besides my shop, this barn also serves as a storage space for unused furnishings and equipment from the kennel and the house. Also stored here is some of my father in-laws hunting equipment. As such the amount of space dedicated to the shop portion of the barn is limited. This shop does double duty as a wood working and metal working shop. This further reduces the amount of usable shop space for either activity. The total usable space is about equal to that in a one car garage. Being tall helps when you have a small shop. You can effectively increase your shop space by using the upper portions of the walls and the rafters to increase your storage space.
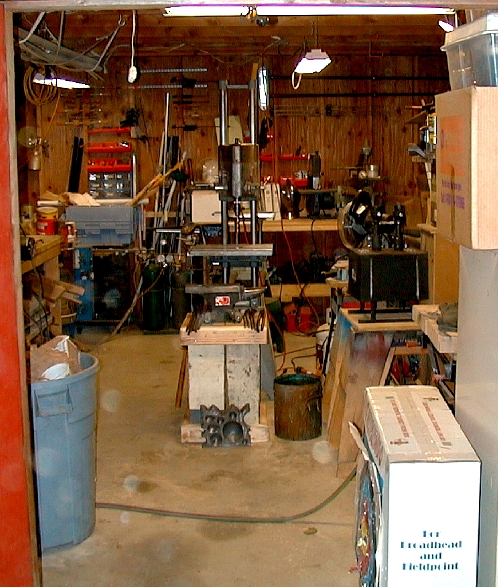
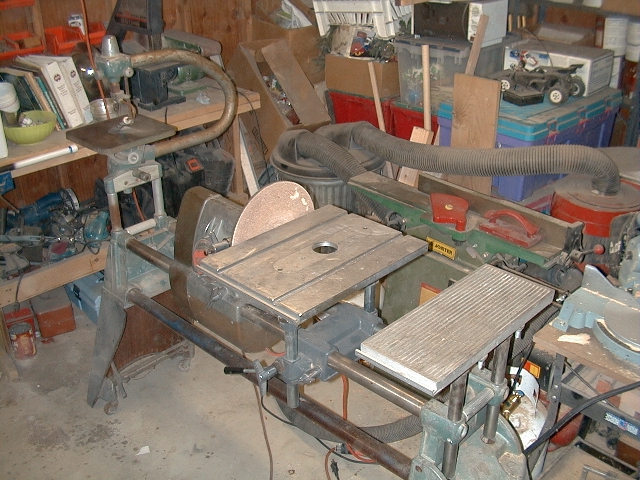
Probably the crowning glory
of my shop, is my Shop Smith. If you are going to do wood work in a small shop,
you should really consider a Shop Smith instead of several different stationary
machine tools. There are advantages and disadvantages to owning a Shop
Smith.
In the advantage column is it's compact size and flexibility.
The basic Shop Smith package does the jobs of a table saw, 12" disk sander,
drum sander, drill press, horizontal boring machine, and a wood lathe. With add
on tools it can do even more. Mine has attachments to let it do the work of an oscillating
drum sander, jig saw, grinder, stationary biscuit joiner and a
router/shaper table. More attachments are available from Shop Smith to further
expand the machine's capabilities. Plus
the Shop Smith has an variable speed drive, that can be safely adjusted
while the machine is running.
The primary disadvantage is the
small table size for the table saw setup. This can
be fixed to some degree by purchasing the table upgrade. The disadvantage that
can't be corrected, is the need to tilt the table, not the blade, when doing
angled cuts on the table saw. Last, it takes longer to change setups between
steps, then it would if I were to just walk over to a different machine.
All in all, however; I really love my Shop Smith,
disadvantages and all. It is still a powerful and durable machine, for all that
is was built in 1957.
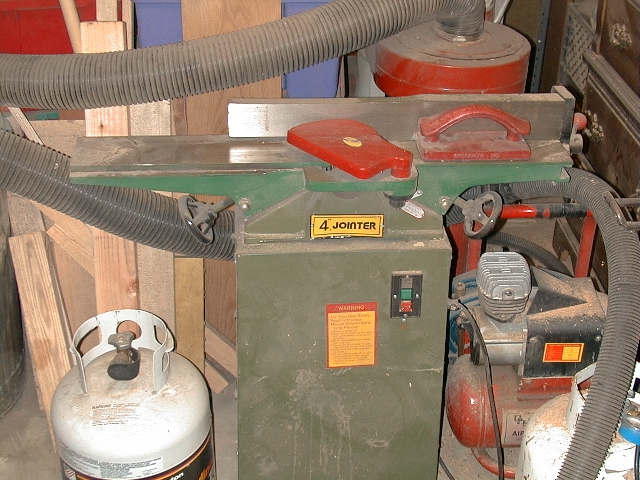
Next to the Shop Smith is my joiner. This was gift from my father, which I believe he got at Harbor Freight. The joiner is a vital tool for doing any furniture work and for other wood working applications.
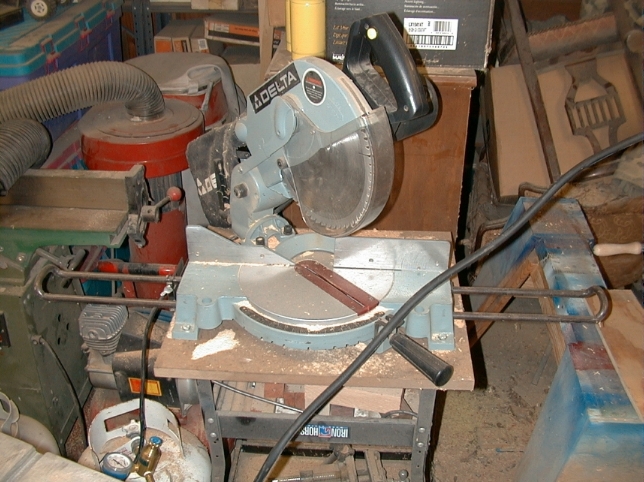
Next to that is a Delta compound miter saw. An ideal wood shop would have three stationary power saws. The table saw, a radial arm saw and a compound miter saw. Each does different operations best. The table saw is best for ripping and cutting dados. A radial arms saw does simple cross cuts on wide stock best. And the compound miter saw, cross cuts smaller stock and, as the name suggests, does miter cuts the best. I don't have the money or space for a radial arms saw, so I have to make the table saw and compound miter saw cover all the bases.
The shop has two work benches (now it has three, see below). One is on the north wall other is on the east wall of the shop. These benches provide work surfaces and storage. One is built over an old wooden dresser which holds a large number of tools for the Shop Smith. The other is built with a lower shelf to hold most of my portable power tools.
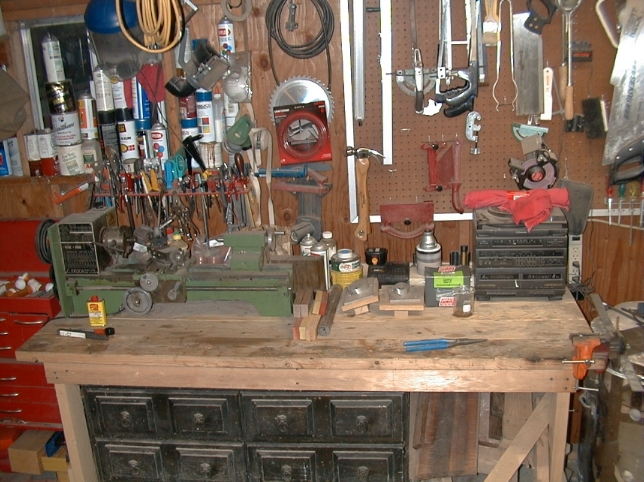
On top of one of the work
benches is a small machinist's lathe, my battery chargers and a cheap beat-up
old stereo. The
stereo is a vital tool in my work shop. Without my tunes, I can't keep the
creative juices flowing. (Sorry for you purists out there, but it's not playing medieval
music, nor even an SCA performer. It's playing classic rock-and-roll from a
local station. ("How about some ah..., Bohemian Rhapsody, Dude? --
Good call, Dude!")
The machinist's lathe was made in Red China. The
instructions that came with it are interesting to say the least. I believe they
were translated by someone that spoke neither Chinese nor English very well. The
lathe is also from my father, purchased at Harbor Freight.
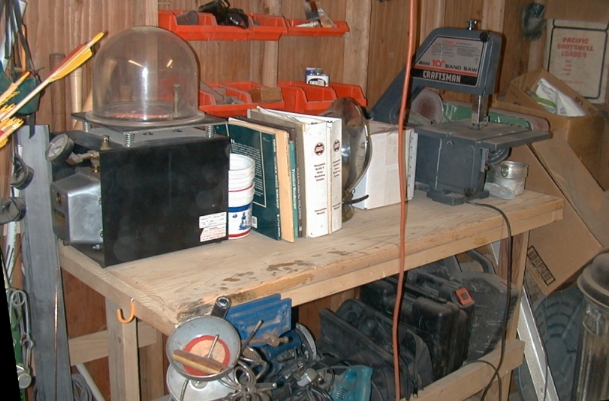
The Other work bench serves as storage for bench mounted power tools on top and portable power tools below. The table tops tools include a Vacuum casting set-up, a small three wheel band saw and a bench mounted 6" belt sander. On the shelf below the bench is store a wide array of power hand tools. They include a saber saw, circular saw, cordless panel saw, cordless portable jig saw (did I mention you can't have too many saws?). Also present are three portable power drills, one corded and two cordless (same thing is true about too many drills). Getting near the end here, we have three portable grinders, one right angle grinder and two die grinders (one electric and other air powered). Last there is a cordless screw driver (whew!)
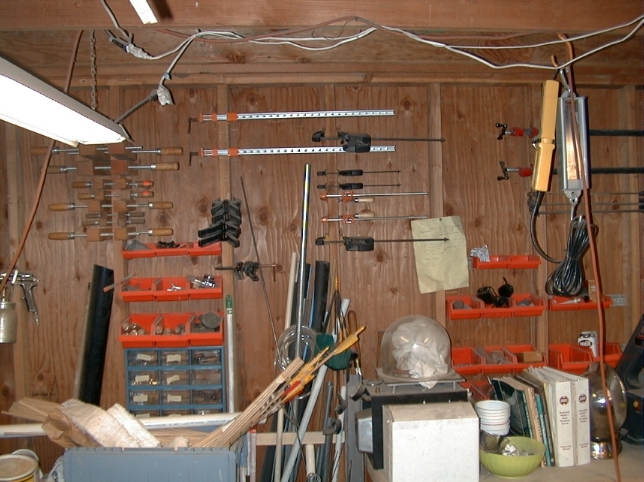
Behind the back work bench, on the back wall is where I store my clamps. According to the great wood working god Norm (worshiped in the temple of The New Yankee Work Shop (let us now all chant his holly mantra, "biscuits and glue, biscuits and glue....) ), you can never have too many clamps. The clamps are stored, taking advantage of vertical space by clamping them to the studs on the wall. Each project I attempt usually results in one or two new clamps being added. It seems I never have enough of the right kind. Don't believe that, or think that it is maybe just an excuse? Try building a table some time and see how many clamps you run out and buy. The last table I built used 17 different clamps. Many of them two and three times each. And I still need more clamps to do that project right. It took an extra day, because I didn't have enough 48" bar clamps to glue up both leg panels a the same time.
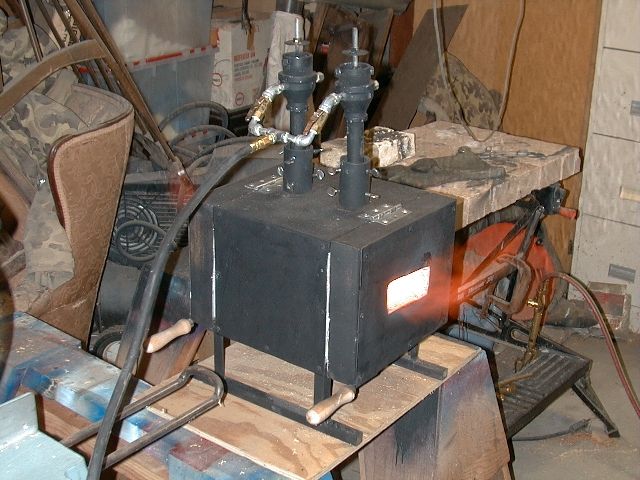
In the Corner of the shop between the two work benches is a mix of things. Perhaps the most important of which is my Oxy/Acetylene welding rig. I learned to weld from my father, at the age of ten. Until such time as I learn to do proper forge welds, this will be the principle tool used in the construction of rapier hilts. Right now the hoses for the welding torch run all the way to the front of the shop, near the doors (where I also have my forge set-up). Also in this corner of the shop is an old desk and large Cress top loading Kiln. The is designed for ceramic work (which my wife intends to take back up in the future). However, we currently use the kiln for the burn out process of lost wax casting. The kiln can also be used for annealing hand made glass beads (a recently added hobby).
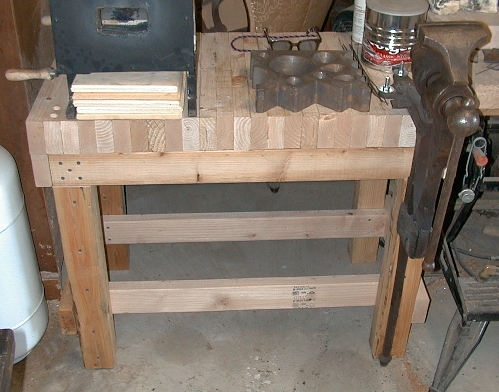
A recent addition to the shop is my blacksmithing tools. On another page of this site, I have documented the construction of my forge. The forge now sits on my new heavy duty work bench, This bench also supports my post vise and swage block. The swage block, I purchased this off of E-Bay, from Ted Keck at Blackstone Mill. He almost always has a new Swage Block listed. I used this block to form the bowl of the welded cable spoon seen else where on this site. Overall I was very pleased with this tool purchase. The post vise also came from e-bay (for a price that can only be called a steal).
A nessary part of any forge shop is the anvil. My first anvil was another gift from my father, purchased at Harbor Freight. It's a smallish Anvil at 22kg (55lbs), made in Red China. Small though it is, it will now serve as a traveling anvil.
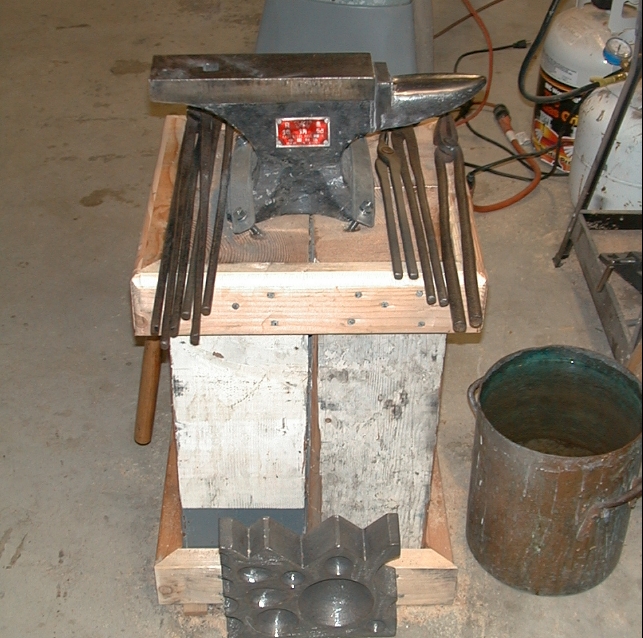
One interesting piece of my forge equipment is the stump for this anvil. I wanted a pretty stout stump, to beef up my tiny anvil. The stump is made by banding four 8x8's together with 2x4's. The interesting part of this, is where the 8x8 lumber came from. You see, it used to help hold up the warehouse roof at work, until a fork lift driver decided it was in the way. Once the broken support column was replace, I asked it I could take the pieces of the old one. (See I'm already learning the time honored blacksmiths skill of scrounging) The stump has a steel bar attached to one side to act as a rack for my hammers and tongs and such. The old tongs were purchased dirt cheap as a lot on E-Bay. One newer set and the blacksmiths pliers were a present from my wife, to help get me started. From here on out, I'll be making my own tongs. But, recall that old blacksmiths saying, that says "you need a set of tongs, to make a set of tongs". The hammers were mostly purchased new. Except for the flatter hammer (another e-bay purchase).
The most recent major acquisition is a new (bigger) anvil. For a long time, I too, suffered from the curse of anvil envy. So my wife gave me a new/used anvil for Christmas. And she was sneaky to boot. She had master Oso of Oso Forge pick up the anvil and deliver it to my parents home to go under their tree. So I never even got a clue it was happening. The Anvil weights 185 pounds and is Swedish make (which means being a part Norwegian smith, I'll have to talk slowly around it and use small words (sorry, couldn't resist, it's just that it is so much fun to "pound" on the Swedish, day in and day out)).
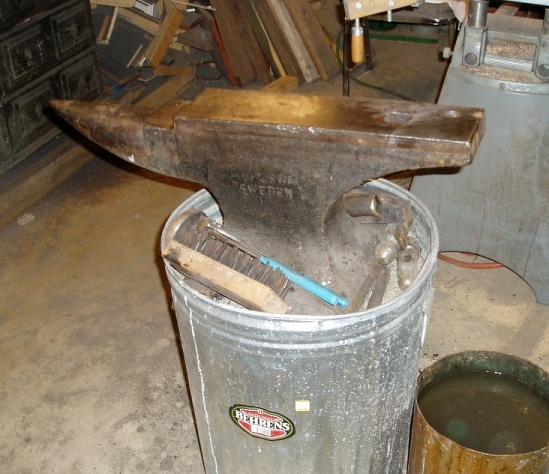
The stump or stand for the new anvil is made much like that used by Master Atar and Master Oso, both. I started with a small galvanized steel trash can. I added a circle of plywood to support the bottem. I filled the can with sand until I reached the level I wanted. I then put another circle of plywood on top of the sand and placed the anvil on top of this. Last, I added a touch more sand, to cover the wood and prevent any fires.
For more information Contact the Author via e-mail.